
This is a Step By Step guide for creating a Microsoft SQL Server service using Google Cloud SQL. We will cover the following key points in this article.
- Create a new Cloud SQL environment.
- Whitelist IP address to connect with Cloud SQL.
- Test Cloud SQL Connectivity from allowed IPs.
- Create a Sample Database.
Step 1: Create a new Cloud SQL environment
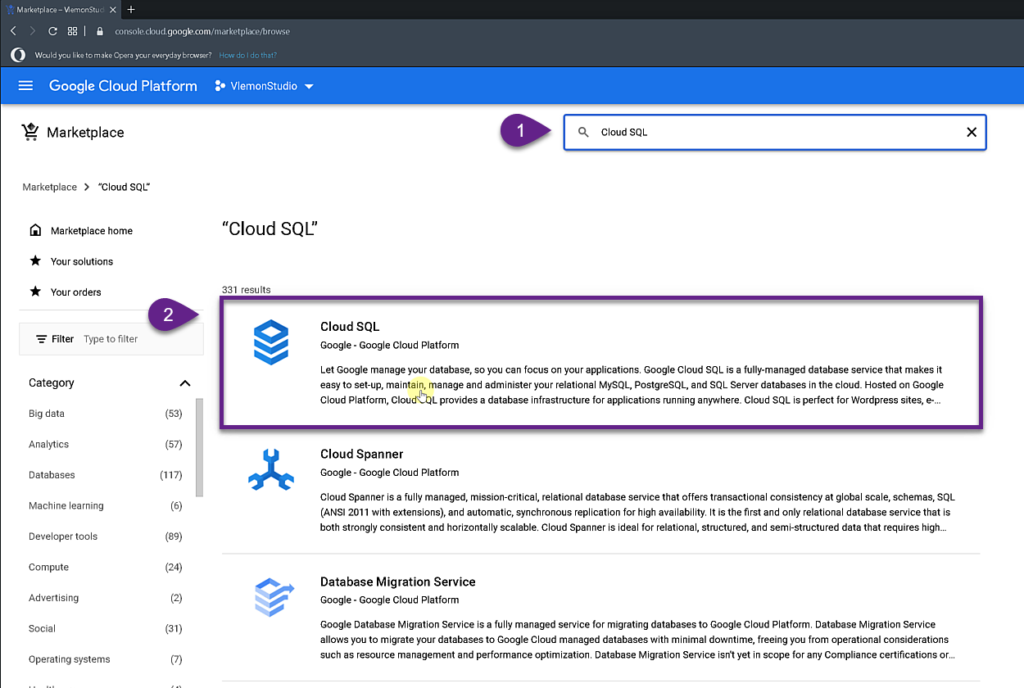
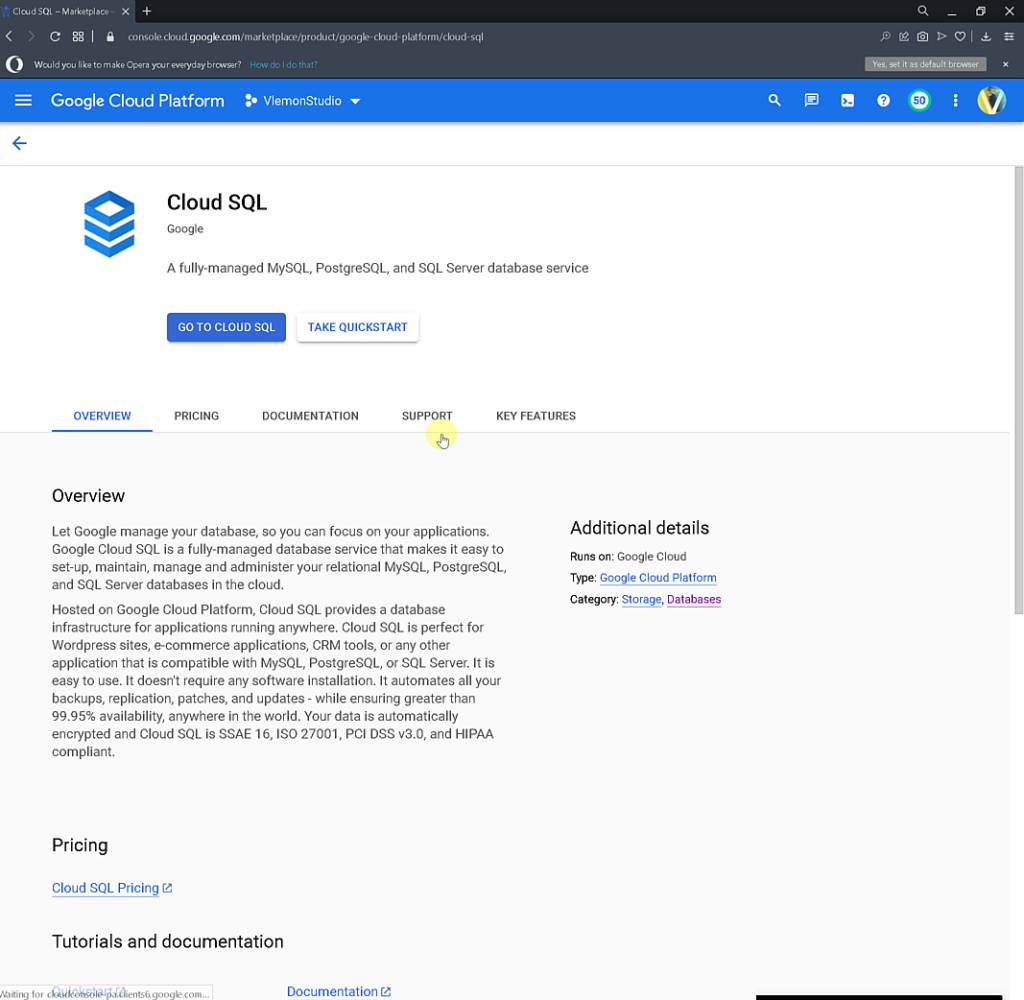
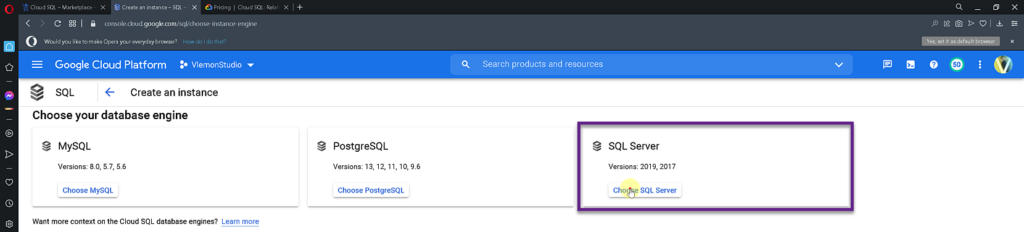
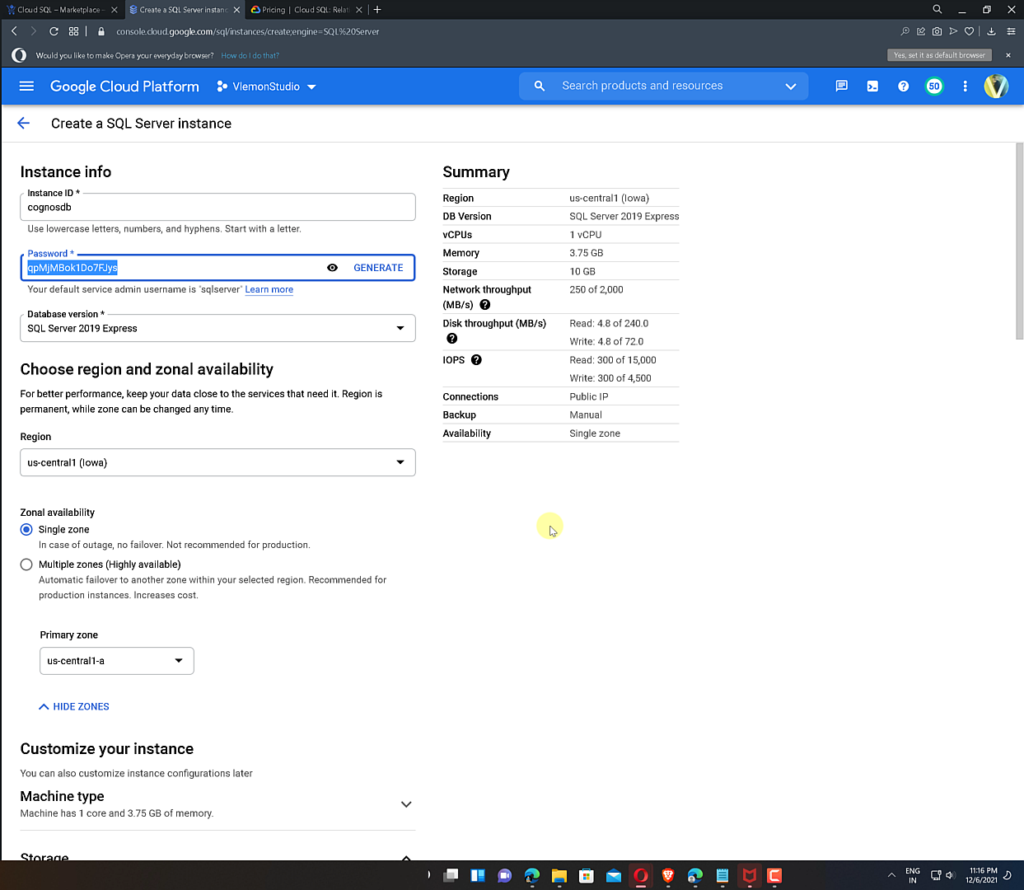
We need to create a new Cloud SQL environment at the first step. First, open the Google Cloud Marketplace. At the Google Cloud SQL dashboard, you can find the Marketplace at the left menu. On the “Marketplace,” search for the “Cloud SQL” and then select the “Cloud SQL.” At the “Cloud SQL” page, click on the “GO TO CLOUD SQL” button. Here we can find or create a new instance. Next, click on the “CREATE INSTANCE” button. After that, we need to click on the “Choose SQL Server” button. Finally, we need to select the value for the following property.
Instance Id: A unique string contains only lower case letters, numbers, and hyphens.
Password: Password for the “sqlserver” admin user.
Database Version: SQL Server version.
Zone availability: Where you need to locate your Cloud SQL instance.
Customize your instance
Machine type: Select virtual CPU and RAM Size. For example, one vCPU, 3.75 GB.
Storage
Storage type: SSD
Storage capacity: Custom 10 GB
Backup: Enable or disable backup.
Once you select all the values, click on the “CREATE INSTANCE” button. Then, wait for the instance to run. Once the instance is ready, we can use its IP address to connect with the database server.

Step 2: Test Database Server Connectivity
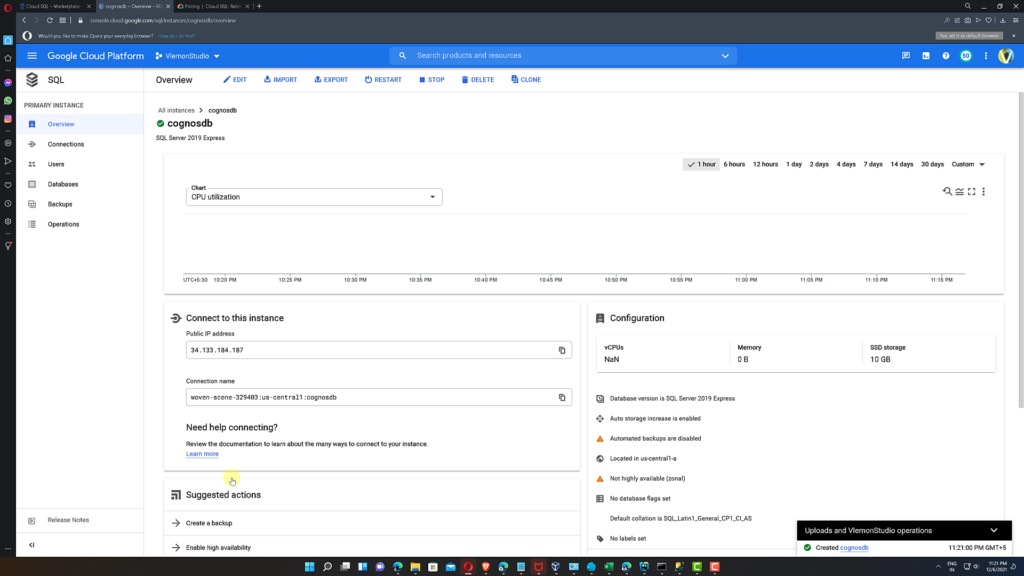
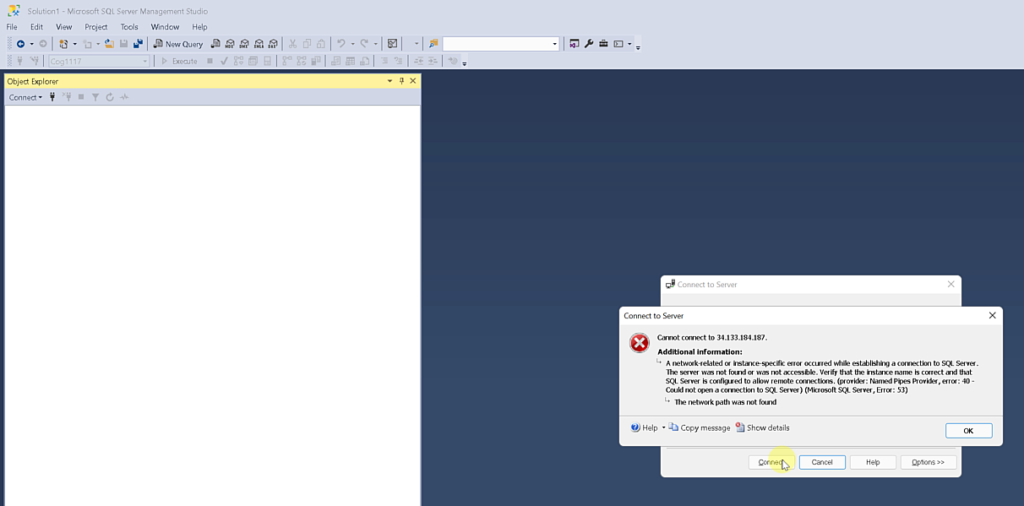
Our Cloud SQL instance is ready. Next, we need to connect with the Cloud SQL instance using the IP address admin user and password we configured in Step 1. As shown in the following image connection is failed.
By default, the Cloud SQL block traffic on all the IP address. We need to add the IP in the allowlist to allow the connection.
Step 3: Add IP in the allowlist
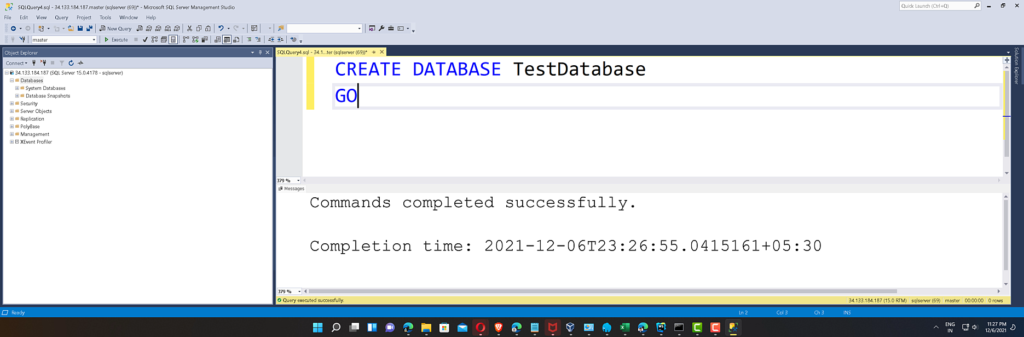
Without adding an IP address in the allow listing, we can’t connect to the Cloud SQL Server. To add an IP address, first, we need to click on the “Connections” and then click on the “ADD NETWORK” button. After that, we need to provide the name and IP address. Finally, click on the “Done” button to save the IP address. Once the saving is complete, we can access the Cloud SQL from the mentioned IP address.

Step 4: Create a Test Database
Finally, we need to connect to Cloud SQL and create a new test database. First, connect to the database server and then execute the following command.
Finally, our Google Cloud “Cloud SQL” Server is up and running. Next, we will learn How to restore a database.